Project repository : sac-etanche
Final Project : NIRVIVAAD
Team : Caroline Roux, Laurence Cotin & Vy Hoang
A Low cost and Low Tech waterproof backpack
Project Summary
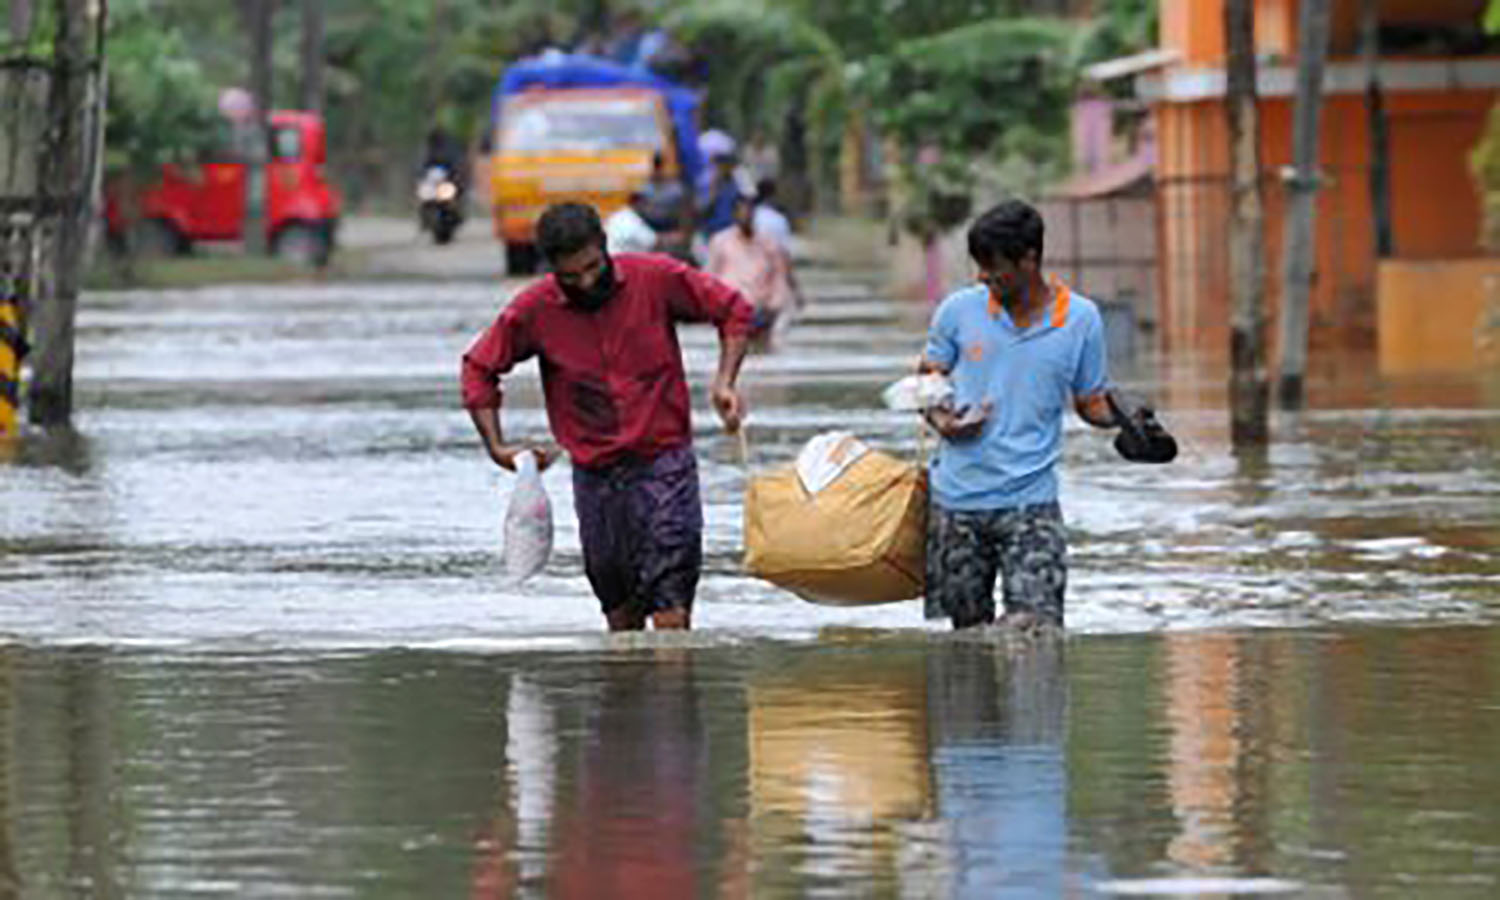
After doing some researchs and talking to indians living in Kerala, we learned that a lot of people have lost valuable items during the flooding of the last summer. To prevent this from happening again, we decided to create a waterproof backpack so that people could protect and transport their personal belongings, like diplomas, certificates, family photos, precious and value objects during the flooding. It could also protect them in the relief camp from all the dirt there is on the ground. The bag is made out of tarpaulin which makes it really affordable, light and waterproof. The tarpaulin is also a really resistant material when the density is over 150g/m2. It can resist to scratches and impacts. Furthermore, this material is really common and easy to find in Kerala, which makes it easy to find and reduces the global cost of the bag. Our bag has shoulder straps to make it easier for people to carry. It also has two layers made out of tarpaulin to increase it’s resistance to impacts and heavy loads. The joints are welded together using a straightener or an iron. This method seals perfectly the joints and allows stored items to stay dry. To close the bag, we have to roll the top 3 times to prevent the water from entering the bag. Finally, the idea is to upload the design in opensource by the fablabs’s network. We will send the bag’s template to the different FabLabs in Kerala, so they can cut with the lasercutter the patterns of the bags and send them to population. The indians can do the bags themselves with the instructions for use and the tarpaulin that they have or get. Our goal is to prevent the lost of valuable items which is a big part of the people’s identity for the next flooding or disaster.
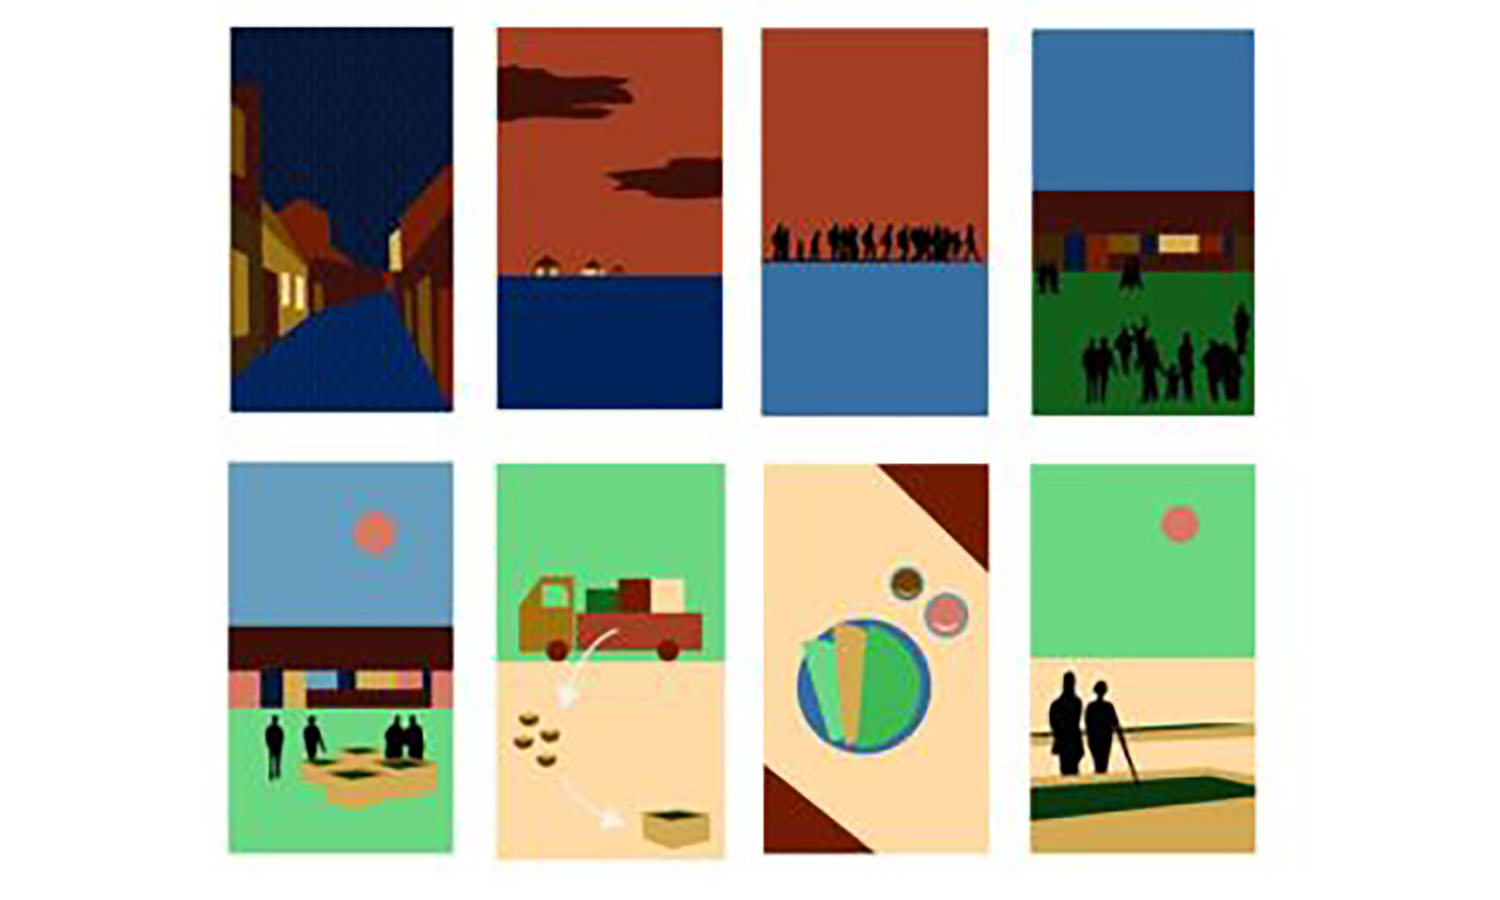
Story Board
- The fabrication starts before the fooding
- The design documents are sent to the 22 Fablabs in Kerala
- The patterns are cutted with the laser in the Fablabs
- The patterns are distributed to the population
- The people can make their own backpack with the instructions
- The indians can put their personal belongings into the bag
Fabrication Tutorials
*Laser Cut File Tutorial *
We made a template of our bag that can be cut in the laser machine of the FabLabs in Kerala. The template can be made out of any material. Slots were made on the template to allow people to trace easily with any pencil.
image pattern design
*Assembling Guide Tutorial *
After tracing the shape of the template on a piece of tarpaulin, people can cut out their bag and follow the « Backpack Template Guide » to know which parts they should fold.
Welding the Joints Tutorial
After cutting and folding their bag, people can weld the pieces together using a hair straightener. For the welding we recommend using the following technique :
- Step 1 : Take baking paper and fold it into 8 layers.
- Step 2 : Insert the pieces of tarpaulin inside the baking paper.
- Step 3 : Close the baking paper with the tarpaulin.
- Step 4 : Insert the baking paper between the two plates of the straightener.
- Step 5 : Hold for 7 seconds at a temperature of 220 degrees Celsius, then release.
- Step 6 : Press firmly with pliers, then slide them over the entire surface that has been heated.
Close the bag Tutorial
To close the bag and make it waterproof, we have to roll it three times and close it with the leash. It’s an universel system that works if we follow the good instruction. If the system is not well close the water will enter. So it’s a fondamental step to keep the stuffs dry.
Fasten the backpack Tutorial
To make the leash of the bag, you need three strips of tarpaulin to create a braid system. The dimension of one strip is 3m x 0,01m. The braid is for the extremity part of the leash.
- step 1 : Make a knot with the three trapulin’strips A, B and C
- Step 2 : Take the strip A and put it between the strip B and C
- step 3 : Take the strip C and put it between the strip A and B
- Step 4 : Take the strip B and put it between the the strip A and C
- Step 5 : Do it again till the end of the rope
- Step 6 : Make a knot to close the system
Make the shoulder’s straps :
In order to carry the bag, the tie method is used. Therefore, you can adjust the shoulder straps as you wish.
- step 1 : Cross the two strips in the middle
- step 2 : The strip B never move
- step 3 : Surround the first strip with the other strip ( x2 times)
- step 4 : Take the strip A and put it below the knot
- step 5 : Put the strip into the knot
The 1 euro backpack
To make our project possible, the most important thing was to make it affordable so everyone could have access to it. So we calculated the prices of the tarpaulin in India according to the various dimension and the density that would be around 150-180g/m2. We noticed that it cost 5 times less in India for the same product and more we can do bags on one tarpaulin piece the cheaper it is.
Zero Waste
To do it more low cost, the project must be very efficient. So we draw patterns as much as possible on different sizes of tarpaulin that we could find in India. So the most efficient would be to chose a tarpaulin with the dimensions 5,2mx3,4m. With that we can make 10 bags with the cheapest price : 0,77 €
Design Variation
The design we chose is to make a backpack with those technics ( tarp + heating ). But we could decline our product into various designs and dimensions with the same method.
Source internet and links
Tarpaulin price in India :
Solder machine reference « how to build it » :
https://www.youtube.com/watch?v=FUCUqaBX9uE
Design backpacks with tarpaulin :
http://rankingnfact.tistory.com/1032
http://www.realestatemarketplace.info/sew-good-a-roll-top-backpack-from-ikea-blue-bags/
Final Prototype
Process : nirvivaAd
Team : Caroline Roux, Laurence Cotin & Vy Hoang
A Low cost and low tech waterproof backpack
Development of the concept
Problems during the flooding in Kerala :
- The sea level can be really high in a short amount of time
- Difficulties to carry personal stuffs
- People don’t have a proper place to put their valuable object in case of flooding
- Many people have lost valuable items (diplomas, certificate, pictures, etc…)
- People leave their personal objects in dirty places in the reliefs camps
- The camps are overcrowded and the personal belongings are all mixed and can be lost
First idea and concept of the project
Our project is to create a waterproof bag in which people could put their personal belongings like diplomas or certificates. Our goal is to fabricate a portable and waterproof bag that can save big parts of the victim’s identity. Our aim is to prevent future floods in India or in others countries. We believe, that tarpaulin is the best material to work with because it’s cheap and easy to find in India and many other places around the world. We also want to make a solder machine to weld the joints of our bag, to assure that it is resistant and waterproof. The final kit will contain a piece of tarp, a solder machine and an instruction manual to facilitate the fabrication.
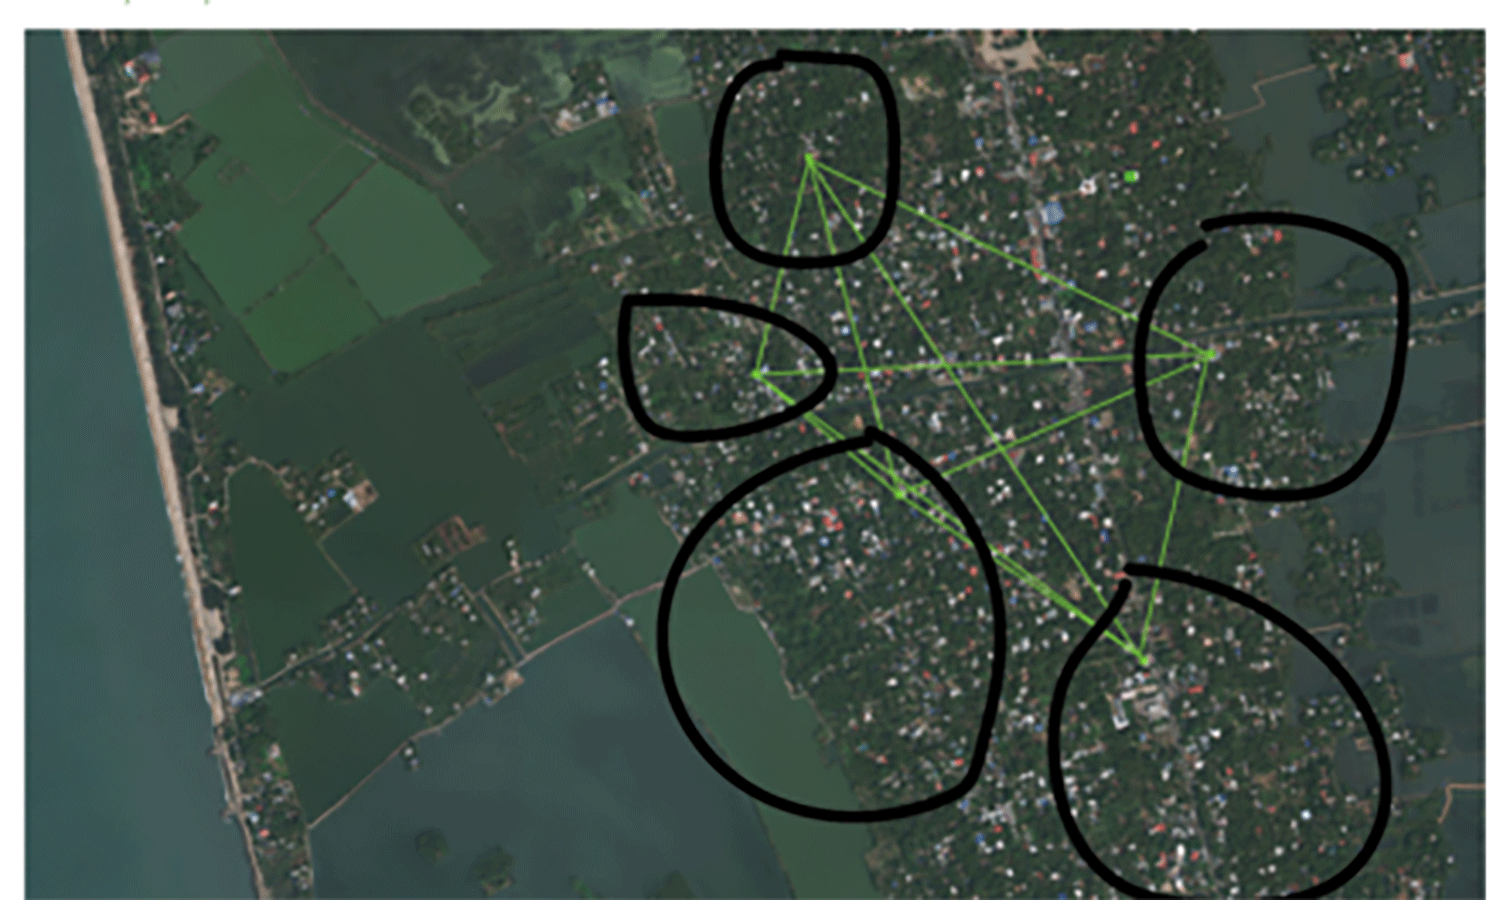
First skype with Kerala : 26 October
22 to 26 October
During this discussion, we were really glad to hear that the Indians thought that the project was a good idea. In fact, they agreed that it was necessary to protect personal items during the flood and told us that many people had lost their diploma for exemple. Water and humidity can quickly impact objects. For this reason, they though that the idea of protecting valuable items was really useful and could be developed.
Meetin report of the discussion :
After doing some research and talking on skype with people that are living in Kerala, we learned that a lot of people have lost valuable items during the flooding. This is why we chose to create something that could protect people’s personal belongings during the flooding. At first, we had the idea of creating a capsule that was made out of a light and waterproof material, but we changed our idea for a backpack to make the transportation easier.
Visiting shops
29 October to 2 November
We went to some shops in Brussels to learn more about the different types of material used to make waterproof bags, what already exists on the market. We also looked at different style and design of bags to get inspired and see what had been done and could possibly work.
- Leconte Shop : we noticed that they had a lot of waterproof bags from different brands, sizes and shapes. The materials were various but they mainly use the « cordura » which is a textile fiber that is really resistant but really expensive as well. It is also quite difficult to find. In fact, every textile is really hard to find. For exemple, the cordura is not made in belgium so we have to import it and it becomes expensive. In order for us to purchase them, we would have needed to order them online because we can not buy them in shops.
- Bike shop : in the shop, we learned more about bags and how we can make them waterproof, but the bags that they were making were really expensive as well. They told us that polyethylene was also used a lot in the bag industry (for exemple the Delivroo bag and jacket).
Informations about materials and brands found in those shops :
Materials :
- PolyUréthane (PU)
-
Tétrafluoroéthylène : (Hydrophobisation de matériaux textiles en polyester avec des solutions de tétrafluoroéthylène télomériques)
- industrial use
- Commercial name : Téflon
- Water vapor can pass but not water
-
Ultra High Molecular Weight Polyethylene (UHMWP) :
- High density
- Good resistance
- Not maneuverable
- Fabricated in labotary (non accessible)
- Expensive
Brands :
-
Cordura → https://www.cordura.com/
- Textil brand
- Fabricated in Nylon but can be mix with cotton or naturals fiber
- Good resistance
-
Gore-Tex → https://www.gore-tex.com/
- Use the Tétrafluoroéthylène
- Blahol → http://blahol.pl/
-
Vaude → https://www.vaude.com/en-BE/
- Manufacture vaude at friedrichshafen in Germany (border of Switzerland)
-
Ortlieb → https://www.ortlieb.com/fr/technisches/waterproof/
- Waterproof
- welding with high frequency
- Double-sided coating gives a very characteristic “tarp” look
Conclusion of the visits :
We found several interesting and effective materials (resistant and waterproof). However, they were often too expensive and difficult to obtain. So we made some research and we found a material that had the characteristics that we were looking for: Tarpaulin
Choice material : Tarpaulin
-
We can find a big amount of tarpaulin in India.
- Shops who have tarpaulin in Kerala :
- City Tarpaulins Factory, Chandiroor, Kerala 688535, Inde
- Arjun Tarpaulin, Oachira, Kerala 690526, Inde
- S.R.T Distributors Private Limited, Shop No. 40/3318, Broadway, Ernakulam, Menaka, Shenoys, Kochi, Kerala 682031, Inde
- …
-
The tarpaulin’s price is accessible
- Tarpaulin’s price in India :
- http://www.tarpaulinhouse.in/downloads/pricelist1.pdf
- http://www.shreetarpaulins.com/price/tarpaulin-prices.html
- The Tarpaulin is really accessible
- The Tarpaulin is a waterproof material
-
Following is density, it can be resistant and strong
Conversation with the electric ingeneer
12 to 16 november
After deciding what material we wanted to use, we thought about the joint problem. Indeed, to make a bag that was completely resistant to water and that could keep the stored items dry, we needed to seal the joints perfectly so that water could not enter. First, we tried to make our own welding machine using a thermal wire so that we could merge two pieces of tarpaulin together using heat. At first, we had a few issues with the circuit, but we managed to make the machine work after talking with an electrical engineer.
- The engineer explained to us the fonctionement of our circuit and how we needed to calculate our solder machine (resistance, voltage, etc.)
- He recommended that we use this website : link of the web site
-
With this method, It’s possible to choose and calculate :
- The temperature resistance (nichromewire)
- The gauges of the resistance (diametre of the nichromewire)
- The length of the resistance (length of the nichromewire)
- The voltage of the battery
#####
Electric circuit of our machine
We use the connector to avoid welding the wires directly on the battery, it also allows us to change the battery when we need to.
Connector ordered on Amazon : see it on amazon
Calculations and choice of parameters :
- Type of resistance : nichrome wire
Nichrome is a metallic alloy between nickel and the chrome. It’s characterized by a good resistance despite the fact that it’s conductor. His resistance allows him to reach high temperatures when there is current passing through it.
- Length of the nichrome wire : 750 mm
That length has been choose to match with the length of the solder machine. The solder machine has been made following the dimensions of a standard backpack.
- Amounth of gauge : 24 AWG
The gauge is a unit to mesure the diameter of the wire. The greater the number is, the lower the diameter is.
Shop the wire on Amazon : see it on amazon
- Temperature : 400 F
Superior to the melting point, which is between 75 °c and 140 °c
- Voltage of batterie : 9 Volts
To calculate the voltage, we modified the diameter of the wire and the length to reach a 9 volts voltage because 9V batteries are more accessible.
- The resistance of the nichrome wire : 4 ohms.
Solder Machine
After understanding how the machine works, we tried to create a new design and made some tests :
Results of tests :
The machine worked well, but the welding between two pieces of tarpaulin wasn’t that efficient. To solve the problems, we had to heat the tarpaulin with a larger surface. That would create a larger joint that would be stronger. So we had to use a heating plate instead of a wire to join the two pieces of tarpaulin together. Plus, we noticed that the 7Gg/m2 Tarpaulin is not strong enough to support the heat. In fact, instead of melting and merging with the other piece, the machine cut it. Even when we succeed to weld the two pieces together, we noticed some holes that were created by the heat. In contrast, when we use a higher density of tarpaulin (150g/m2), the material is more resistant to heat.
75g/m2 Tarpaulin heated : Don’t resist to high temperature
150g/m2 Tarpaulin heated : Resist to hight temperature
Instructions for assembling the solder machine :
List of materials :
- 3 mm wood (or another material) to make the machine
- 2 screws with a 4 mm diameter
- Red and blue conductive wires
- Nichrome wire 24 AWG
- Conductive metal spring
- 9V battery
- 9V battery connectors
- Small hinge
Steps to make a solder machine :
All the pieces of the machine can be laser cut and then assembled by following the assembling guide
- The pieces are made for a material with a thickness of 3 mm (we used wood, but it can be made of another material).
- The pieces are cut with the laser machine.
- The pieces go from a to o.
- Assemble the legs (d and e) with the middle piece f.
- Connect the piece c on top of the assembling from the last step (d, e and f).
- Result after assembling c, d, e and f.
- Assemble the legs (m and n) with the middle piece o.
- Connect the piece c on top of the assembling from the last step (m, n and o).
- Result after assembling c, m, n and o.
- Repeat step 1 with the pieces g, h, i and the pieces j, k, l.
- Add the two new assemblings to the piece c.
- Glue the pieces a and b together.
- Roll the red wire around the screw.
- Put the first end of the nichrome wire into the hole.
- Screw the screw into the hole with the red wire. The screw should allow contact between the red wire and the nichrome wire.
- Put the other end of the nichrome wire into the second hole.
- Screw the screw into the hole to stabilize the nichrome wire.
- The nichrome wire should go from one screw to the other.
- Pass the other end of the red wire into the hole of the piece a-b.
- Solder the red wire on the battery or on the connector of the battery.
- Solder the first end of the blue wire on the battery or on the connector of the battery.
- Pass the spring into the second hole of the piece a-b.
- Put a little bit of hot glue, so the spring can stay in place and make sure that the spring protrudes a few millimeters below the piece.
- Solder the second end of the blue wire on the metal spring.
- Connect the two parts of the machine using a hinge.
- To keep the machine open and cut off the power, insert the pieces of wood (p) into the hole provided to prevent the machine from closing.
Results:
We tried to merge two pieces of tarpaulin together with our machine, but the results were really disappointing. In some cases, we manage to join the two pieces, but they could be separated really easily by slightly pulling them apart. In other cases, the hot wire cut the pieces of tarpaulin in half. So we did not obtain a perfect seal.
Problems and alternatives
26 to 30 november
Solder machine with plate?
Considering the fact that the joint with the wire wasn’t strong enough, we explore the way to weld with a plate instead of the wire. We talked to a technician: David Jushpe. He explain to us that a simple 9voltes battery won’t be enough to heat a metallic plate and that we needed a car or a moto battery to heat it. Those one are very expensive and very big. Plus the fact that it won’t be easy to find. All those reasons convinced us to abandon the idea of making a solder machine by ourself and use a hair straightener or an iron which are low tech technic. Simply reuse material people already own. Those objects use the same concept of heating plate but are easier to find and more accessible.
Tests with a hair straightener :
- Fold the baking paper to create 8 layers
- Insert the tarpaulin pieces into the baking paper
- Close the baking paper with the tarpaulin inside
- Insert the baking paper between the 2 heating plate of the hair straightener, then press
- Heat it for some secondes (cfr tables)
- Press strongly with the gripper, then slide the gripper in the wholes heated surface
Results:
- The two pieces are well welded together
- The joint is waterproof
- The joint is strong
####
Second skype with Kerala : 4 December
3 to 7 december
-
What needs to be protected?
- Diplomas, important documents (legal, educational, family photos)
-
What is the most practical size for the bag?
- A3 or A4, space for a FabAcademy Certificate
-
What is a common way to carry bags in India?
- Any type of bag is appropriate
-
Is tarpaulin a good material for the bag?
- Yes waterproof, but not enough resistant for the remains (débris)
- Tarpaulin is easily torn apart, not enough resistant.
- Need a durable material
- They proposed the idea of a bag created with an inner line which would be waterproof and an outer line which would be resistant. (with two layers)
Origami way of folding a new way to design a bag ? :
https://issuu.com/designpackaging/docs/packaging-dielines-free-book-design_7fb37ab8a1c323
https://issuu.com/cats70/docs/packaging-dielines-free-book-design
Tests
10 to 14 december
Ideal temperature
The only problem with this method is that we did not obtain the same result depending on the temperature of the hair straightener and how much time we were holding pressure. This is why we decided to make tests with different temperatures and by varying the number of seconds we held pressure. Here are the results of these tests :
Tests for the ideal temperature to weld the tarpaulin with a hair straightener :
- tests done with tarpaulin 150 g/m2
- tests done with 8 layers of baking paper
- tests done with 2 pieces of tarpaulin ( one layer of the bag pack)
| Températures | 5 sec | 7 sec | 9 sec | 11 sec | 13 sec | 15 sec |
|---|---|---|---|---|---|---|
| 220 C | Welded, strong and well done | Welded, strong and well done, Can not be detached | Welded, strong and well done, Can not be detached | Welded, strong and well done, Can not be detached | Welded, strong and well done, Can not be detached | Welded, strong and well done, Can not be detached |
| 200 C | Welded, strong and well done | Welded, strong and well done, Can not be detached | Welded, strong and well done, Can not be detached | Welded, strong and well done, Can not be detached | Welded, strong and well done, Can not be detached | Welded, strong and well done, Can not be detached |
| 180 C | Welded but not strong | Welded and strong but not well done | Welded and strong but not well done | Welded, strong and well done | Welded, strong and well done, Can not be detached | Welded, strong and well done, Can not be detached |
| 160 C | No effect | No effect | Welded but not strong | Welded but not strong | Welded and strong but not well done | Welded and strong but not well done |
| 140 C | No effect | No effect | No effect | No effect | No effect | Welded but not strong |
Observations :
- It is noted that the Tarpaulin contract in contact with the heat.
- 15 seconds at 160 C: The result of welding the two pieces of Tarpaulin.
The two pieces are very well welded, but the texture of the plastic at the weld is not very smooth and uniform.
- 11 seconds at 180 C: The result of welding the two pieces of Tarpaulin.
The two pieces are very well welded. In contrast with the previous piece (15 seconds at 160 C), it has a much smoother, more uniform texture.
Questions/ answers
10 to 14 december
WATERPROOF BAG Questions - Laurence COTIN - Caroline ROUX - Vy HOANG
Denis - What is the price of a bag? Will it be affordable?
Yes it will be affordable. The price of the bag will be 1 euros/ 324 rupees.
- Find the Tarpaulin price of 150 g/m2 in Kerala
- Find stores where you can buy them. (map)
Will there be multiple sizes/formats?
For the moment we have designed a single sized bag that can accommodate personal objects such as a diploma, … So we have taken on minimum dimensions for that. However, if the Indians want to create a bag of the same size or smaller design, they will simply change the scale of the boss.
Is the bag floating?
Yes, the bag has to float. However, it also depends on how much weight you put in it. Density smaller than 1000 kg/m3 ( water density).
- Weigh the bag to know its weight.
- Calculate its capable volume.
- Calculate the density of the bag.
- Calculate the possible weight to put in.
- (make label for the backpack)
Is the bag strong enough to hold a large mass? How will you estimate the maximum portable load and if the bag can float in this situation?
Yes, it will be strong enough to support a weight of 15 Kg. However, it is recommended not to exceed a weight of 8 Kg to ensure its flotation.
- Do several tests with differents to see how the bag resists + photos.
- Make tabs + graph.
How many bags for a tarp of how many meters?
In a tarp of 2m x 3m so 6m2, we can ensure the realization of two bags having a double layer.
- How many bags for a tarp of how many meters?
- The straps will be included in this same tarp.
How and in what way will the straps of the bag be made?
In Tarpaulin or in the same material as the nylon straps used for closing the bag.
Will they have to have all their identity documents always in the bag or is it something to use just in the moment of the flood?
It is recommended to leave the identity documents in the bag at all times, but it is their personal decision. If he decides to remove it, it is their responsibility.
If a ridge is problematic for waterproofing, is it possible to forget the rectangular shape?
Although our bag appears to have 8 joints, it actually has only 4 joints. The other 4 are there to make folding easier and have a more uniform design. See the pattern. The form has nothing to do with waterproofing since they are minimized and very watertight.
Regarding smoothing iron, do you think this type of machine exists in India?
If the Indians do not have smoothing iron, it is also possible to use an iron with the same technique.
- Look for the cost of haire straightener/ Iron
- Look their availability in Kerala/India.
How would the bag look? Only bag-to-back or handbag? Or could be otherwise and therefore generate other use than during the disaster as for picking, tea or spices?
Wearing on your back, is the most ergonomic and practical way to reduce exertion and have free hands. Also, according to the Indians we interviewed during the skype, they wear a lot with the shoulders. A handbag is therefore not desired for this purpose.
Is the Tarpaulin strong enough for this purpose?
Yes, we tested the resistance of the bag by pulling all our forces on it. In addition, we have selected a Tarpaulin with a higher density (150 kg/m3) and the bag will consist of a double layer for more resistance to blows and water.
Have you found an optimal temperature?
Yes, the optimal temperature to weld the bag with a Tarpaulin thickness is 180 degrees for 13 seconds. This temperature is the one that enables the desired and most effective result to be achieved as quickly as possible. The optimal temperature for bag with two Tarpaulin thicknesses is 220 degrees for 15 seconds.
- make table for 2 layers with the same variables.
Work on the bag pattern
Cutting file for the laser:
- Dimension of the cut laser : 1.2m x 0.8m (en jaune)
Instructions for use of the bag : (How to assembly)
- Write dimensions
- colours Code
- Cut, fold, …
TEST OF THE AMOUNTH OF BAGS THAT CAN HOLD ON 1 TARP:
First sales website link and Tarpaulin price in India (Mumbai)
Second Tarpaulin site and price link in India (Chennai)
http://www.tarpaulinhouse.in/downloads/pricelist1.pdf
TARPAULIN BRUXELLES :
Dimensions : 2m x 3m
Density : 150 g/m2
Price of the tarp : 12 euros
Price of the bag : 4 euros/sac
Amounth per Tarp : 3 sacs
TARPAULIN INDE :
Dimensions : 2,4m x 3,4m
Density : 150 g/m2
Price of the tarp : 3,99 euros / 324 roupies
Price of the bag : 1 euros/sac
Amounth per Tarp : 4 sacs
Dimensions : 2,4m x 3,4m
Density : 150 g/m2
Price of the tarp : 4,99 euros / 405 roupies
Price of the bag : 1 euros/sac
Amounth per Tarp : 5 sacs
Dimensions : 5,2m x 3,4m
Density : 150 g/m2
Price of the tarp : 7,99 euros /648 roupies
Price of the bag : 0.88 euros/sac
Amounth per Tarp : 9 sacs
Temperature tests ideal for welding Tarpaulin with smoothing iron:
- tests done with a Tarpaulin of 150 g/m2
- tests done with 8 layers of baking paper
- tests done with 4 pieces of Tarpaulin (two layers for the bag)
| Temperatures | 5 sec | 7 sec | 9 sec | 11 sec | 13 sec | 15 sec |
|---|---|---|---|---|---|---|
| 220 C | No effect | Welded but not strong | Welded, strong and well done | Welded, strong and well done, Can not be detached | Welded, strong and well done, Can not be detached | Welded, strong and well done, Can not be detached |
| 200 C | No effect | No effect | Welded and strong but not well done | Welded, strong and well done | Welded, strong and well done, Can not be detached | Welded, strong and well done, Can not be detached |
| 180 C | No effect | No effect | No effect | Welded but not strong | Welded, strong and well done | Welded, strong and well done |
| 160 C | No effect | No effect | No effect | No effect | No effect | No effect |
| 140 C | No effect | No effect | No effect | No effect | No effect | No effect |
Link site design zero waste pattern :
https://www.milanavjc.com/high-waisted-zero-waste-trousers?fbclid=IwAR0bhnFO0YiNu5x5JMdlhLxos-XiCthGK-czqUVdfOoOIyF-31khPZBamfA `
Prejury to Jury
23 december to 10 January
After our first presentation and the following comments from the students and teachers, we improved some aspects of our project :
Design:
We improved the pattern of the bag in order to make it easier to use.
A waterproof closure :
In our first prototypes, the rolling part of the bag was difficult to execute. The Tarpaulin is not easy to handle and we coudn’t hold it correctly. To prevent those problems we change the design of the leash to make it larger and stronger on the top of the bag and do the braid system only on the extremities.
A new pattern :
About the pattern, one of the question was hisdimensions and his transportability. In fact the pattern should be done in a hard material, and the size is big: 1,22m x 0,88m. In order to make in transportable their are two options. We can make it foldable or we can divide it in parts and use the puzzle concept.
Process:
We noticed that some welding parts should be done before some others. In the last prototypes, we welded the straps at the end, when the bag was completly done but we noted how difficult it was to weld the straps with the bag. Because of the irregular surface, the iron touches the bag on a too big surface and burn it. The braid rope should be weld on the top of the bag as well because. This way make it easier to roll and avoid to the user to loose it.
Tests:
In order to proove the efficiency of the project, we did 3 tests:
Weighty test
Resistance test
wterproof test