Project repository : Orientation-Buoy
Orientation Buoy
By Lucile CAU-JOINDANNES, Katarzyna CHLODEK, Noel LIMA
A buoy made from recycled plastic on which we attach bottles in order to allow a better orientation in submerged villages in Kerala.
Presentation of the project
The buoy help answering to the orientation problem in Kerala during flooding. In fact, this device would allow people and help boats in submerged regions move more safely to reach a safer place. The roads would be delimited, so no boats woud be damaged in the process of helping people. The recycled plastic used to create this buoy is a durable way to have a rigid, resistant to impact and light device in Kerala’s villages. Its simple shape allows a quicker realization, but still procures the visibility needed to help the population. In order to keep the indian landscape free of installations, we placed it in the ground with an automatic device that ejects it when needed. The buoy would procure populations permanent and floating landmarks placed in strategic places (each side of the road and crossroads). The Fablab would be useful because of the machine to schred and melt the plastic as well as cutting with the CNC, but it can also help with the diffusion of the project so people can bring improvements.
How the project will be implanted in Kerala
The project of buoys is made in prevention of another flood so people have the time to get used to it.
- First of all, the files necessary to cut the mold and the steps of fabrication of the buoys were created in order to have clear instructions to give Kerala’s Fablab for a more efficient production.
- The files will be sent to Kerala so they have the informations to make the buoys with materials available locally like coir (coconut fibers) rope and plywood (that is cheaper in the south of India).
- The creation of the buoys in FabLabs and their assembly with coloured recycled plastic bottles. It allows to clean the landscape from plastic pollution to an helpful finality.
- The government places the buoys and their boxes in the right places in prevention of next monsoon season or flooding. The priority goes to the villages that often submerged by water.
- People needs to get used to the box in their landscapes and their position in the village in order to find their way more quickly when needed.
Production of the buoy
The mold is a succession of layers (cutted at the CNC) which are glued together in order to have the wanted shape for the plastic floating piece. It is important to know that it can also be done with a metal mold (which can be used for many buoys) and that therefore will save steps and time we need to produce the wooden mold.
Once the mold is ready, we paint the inside with a glossy paint so the melted plastic does not stick to the wood. After creating the mood, we install the shredded caps in the mold and then put it in the oven to melt at 200 degrees and compress. Finally, we add the caps (not shredded), on top of the plastic piece (when still hot), which will work as the attachments for the bottles and wait for the buoy to dry and therefore become rigid.
Installation on site
The buoys would be installed underground already assembled and attached to the ground. When the water would start to rise, the device would eject the buoy and it would be floating. That way, with the colors of the bottles (red or green) people would know where is the road and what are its dimensions. They could also see the crossroads and find a way to get away safely. As pictured, the plastic central part would be in the box and when the water would rise and get into the box - the plastic part would float.
Position
The buoys would be placed on each side of every road of the submerged villages, and also at the crossroads (as represented on the image beneath). The codes of navigation will be used in order to have a good comprehension from every fisher boat that is confronted to it. They will need to pass in between the green and red buoys, with the green at their left (and therefore the red one at their right). There are also yellow buoys in case of danger or obstacle in the middle of the road. This implies the need of a helper going first to see if there are any, the simplicity of the buoy is then very practical because they can have some buoys to place with them. The location at crossroads allows people to orientate themselves as well as defining the roads and their width.
Materials
[The interest of using recycled plastic caps and bottles to produce the project is the fact that they are free and are even helping to clean a little the landscape from plastic pollution. The materials necessary for the orientation buoy are:
- Wood with a coating so the plastic does not stick to it : approx. 40 roupies/ kilogram (50 cents)
- Paint (to color the bottles) : 125 roupies/ kilogram (1,55 euros)
- Rope : 40 roupies/kilogram
The rope chosen is a coir rope (made with coconut fibers) which is used a lot in India and is also quite cheap. It is used a lot by fishermen as a fishing net, because it is quite light and does not drag the boat down because of its weight.
]
We would help in priority the villages that are totally submerged in floods. However, if we produce for every villages that is affected by floods, it represents an approximation of 774 villages, with aproximately 42 buoys per village : 32 508 buoys to produce.
What is still in progress
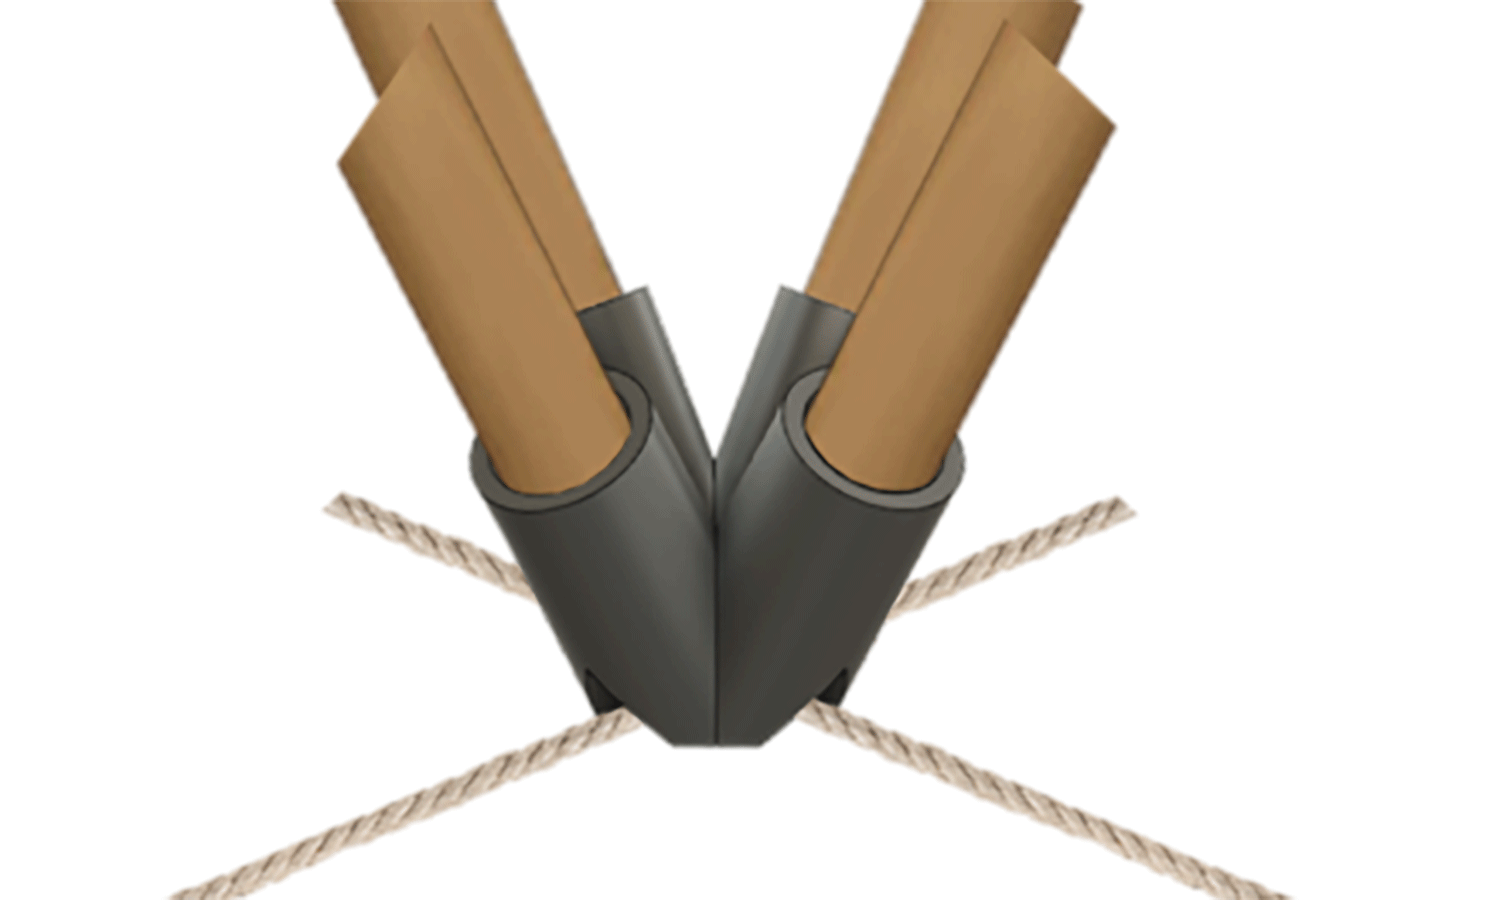
We need to work on the fact that we still don’t know how exactly the rope will stay in the same point than the box in order to give exact directions and lenghts to people using the roads, with only an attach on the ground. One of the proposition was the pulley; it was not perfect in some ways but it could keep the buoy in place.
The problem with the pulley is that it would work in the presence of a street light or tree, but eventhough there is a great presence of trees in indian villages, in the case there is none, we would encounter the problem of making buoys misleading. The situation would be the same if the current is very strong or the tree brakes.
References
- News18. (2018). A Look at the Extent of Destruction and How Kerala Battled the Flood Fury. Found at https://www.news18.com/news/india/a-look-at-the-extent-of-destruction-and-how-kerala-battled-the-flood-fury-1854935.html
- IndiaMart. (2018). Coir Rope. Found at https://dir.indiamart.com/alappuzha/rope.html
- Wikipedia. (2019).Coir. Found at https://en.wikipedia.org/wiki/Coir
- IndiaMart. (2019). Paints. Found at https://dir.indiamart.com/impcat/paints.html
- IndiaMart. (2019). Paints. Found at https://dir.indiamart.com/impcat/exterior-wall-paint.html
- IndiaMart.(2019). 8mm Plywood Sheet. Found at https://www.indiamart.com/proddetail/8mm-plywood-sheet-18295820148.html
- ContractorBhai.com.(2018). Cost of Plywood in India https://www.contractorbhai.com/2016/05/07/cost-of-plywood-in-india/
Process of making : Orientation buoy
By Lucile Cau-Joindannes, Katarzyna Chlodek and Noel Lima
First idea
The first idea we had to help the situation in Kerala, was to create a floating community space on fisher boats so people could support each other during difficult times. We then realized, that creating this device would keep boats in place instead of helping others, which was not a good finality.
Final idea
In order to help people in Kerala, we decided to find another problem to solve. Instead of concentrating on community spaces, we decided to work on the problem of orientation during and after the floods, especially in villages that are completely submerged. People lose all of their landmarks and sometimes can’t find their way back to safety (or home if they are coming back). The project seemed to please our contacts in Kerala who thought it was a great idea to help people and boats find their way and mark out the streets. It would also prevent helping boats from destroying on fences and houses that are hidden under the water.
Contact with specialists
To have more information on buoys and how they work, we made some researches on the navigation codes (colors and positions) and we also called FullOceans, a french company that sells different models of navigation buoys. We asked them some information on how buoys were made, the dimensions and materials generally used and if it was possible to build a low-cost, local made buoy. It seems to be quite complicated to create a cheap but resistant enough buoy so we continued our researches.
We also had contact during the skype with people working in Kerala’s major Fablab (Trivandrum) and other fablabs. Concerning the project they helped us have some informations on how the fisher boats were organised during floods and if they saw a necessecity for our project. Because it is a project made in prevention, people would have the time to get used to the functionning of it and would be ready for floods.
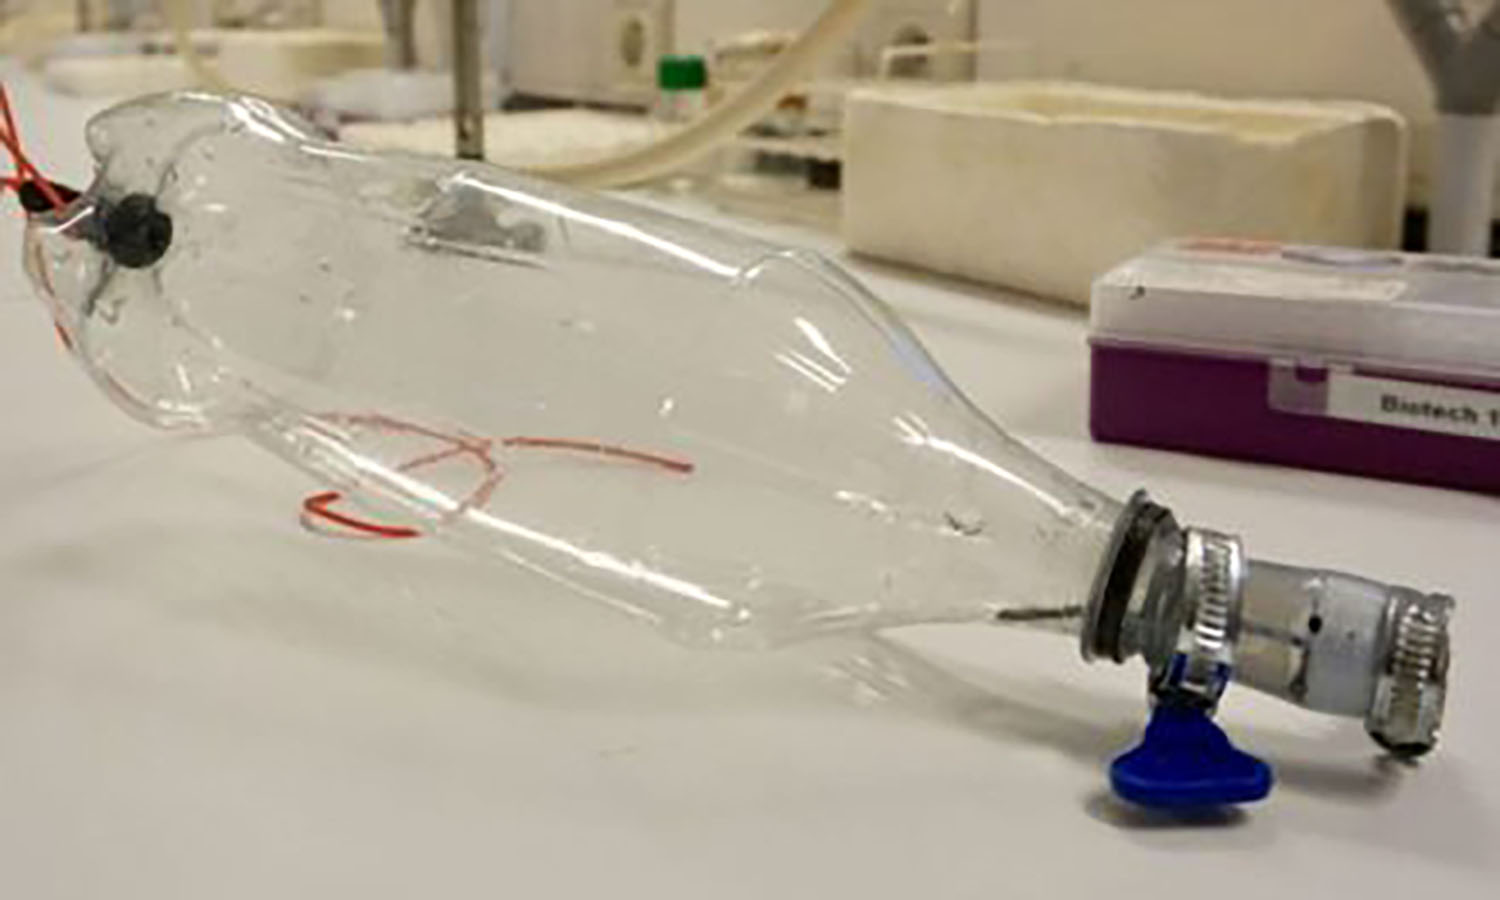
First prototype
We decided to test a prototype of a wooden central part that would be laser cutted, superposed with tarpaulin that would make it waterproof and also with places to attach plastic bottles so it would float.
As it is easy to see, this prototype was not efficient at all, because of two main reasons. The first one is concerning its resistance; tarpaulin is waterproof, but does not resist to branches or any other remains that could be in the water. Therefore, if the tarpaulin is open, the wood is exposed and can be destroyed easily by the contact with water. The other reason is the fact that this prototype was long and complicated to assemble, with many steps that would waste too much time in Kerala. They needed something easy and quick to assemble to help as many people as possible in the shortest period of time.
We wanted to attach the buoy to the ground and leave it outside so people could have access to it easily during the flood. However, we realized that it would be better for its durability to have it in the ground, so animals, people or bad weather would not be able to damage it.
Second Prototype
After this attempt, we concluded that we needed a central part that would be resistant, that would be waterproof and that could be efficient to assemble. While asking some students from another class some questions, we found that the plastic melting technique produced a very resistant material that would not be degraded by water over time and that also could have a aesthetic aspect. Doing more researches on the subject, we found the group Precious Plastics. They recycle plastic to make objects that are very resistant and quite aesthetic.
After watching the process of making these plastic products, we wanted to try with the bottles plastic (not the caps). We were informed that it was not as rigid as the caps plastic, but because we wanted to have something resistant and not especially rigid, we tried it. Since we did not know how worked the CNC machine, we did the wooden mold ourselves with the tools we had and shredded the plastic in the fablab machine.
After searching on Internet some information on the process. We found that the temperature needed to melt this kind of plastic and to put the oven at, was 220 degrees. Also, the mold needed to be in wood that had a coat because otherwise, the plastic would stick to it and we would not be able to get the prototype out.
As it is possible to see, it did not work out, because the wood burned before the plastic could melt. Also, there was enough plastic in the mold to create the piece and we should have put more for the prototype.
Also, at this step we decided to have a box in the ground that could contain the buoy and its rope and the bottles so they could all be protected from exterior factors.
Third Prototype
For the pre-jury we created a form that would make a bubble shape with the bottles, with many faces. The visibility procured by this shape was great, but the making would be way too difficult (mold) and would need a lot of plastic.
After the comments, we decided to change the form for something more simple but still efficient for orientation. After this error, we decided to try the same experiment but with only cap plastic and a more appropriate wood for this experiment.
Last Prototype
Visibility Test
We still thought about the different faces so the caps could be melted easily in the central part, but the top would be flat instead of 3D. In order to confirm that it would work, we experimented on the necessary distance to see clearly bottles. We also tested with the paint so we would have the complete effect.
Working the CNC machine
The first tried shape
We also created a mold on Fusion 360, so we could work on the CNC.
By superposing the layers of wood, we can create a more efficient mold without screws (only glue), so less steps and an easier assembling. The third part is the needed to compress the plastic as it is melting to have a compact result (the octogone is in 3D).
The second tried shape
With further research, we discovered that the octogonal form was not the more efficient or simple one and the result would not be as different than a regular form such as the rectangle. The rectangle could allows as many bottles as the previous shape but with a simplier mold.
In order for the melted plastic to not stick to the wood we painted the interior of the mold with the exterior paint we used for the bottles. That way the melted plastic will be on a smoother surface and will be easier to extract when dry. We then shredded a lot of caps to melt them afterwards. For the caps plastic, after some researches and questions, we found that we needed to put a temperature of 200 degrees in order to melt the shredded caps.
Integration to the ground
Concerning the functionning of the buoy during the floods, we decided to put it in the ground so it could be protected from animals, people and other situations that could break or damage it. The first idea we had, was to put the central part in the ground with a place for bottles (apart from the central part), like this, people could come screw the bottles in place when needed.
We realized that in time of crisis, the priority was not to put the bottles on the buoy, so we decided that the bottles would be screwed manually but before the flood and that with a certain device, the complete buoy would be ejected from the ground.
Position of buoys
Finally concerning the position of buoys in the villages, we first decided to put them in strategic places in the village so people could find their way from places they knew, for example the forum of the village.
Then we realized that in order to have an efficient rescue or escape for people, we needed to delimit every road of the village. Therefore, we decided to put buoys on each side of the road at the start and finish of it to delimit it easily, and also at the crossroads so everyone can see the width of streets and be able to anticipate the turns.
##References
- Wikipedia. (2018). Polyethylene. Found at https://fr.wikipedia.org/wiki/Poly%C3%A9thyl%C3%A8ne
- Youtube. (2018).Kerala Flood: The Human Story in English || Documentary By Discovery 12 Nov 2018. Found at https://www.youtube.com/watch?v=nXtx7SdM65M&feature=youtu.be&fbclid=IwAR0AGx5HDrIOUuYEih0ZvK2X3vIttaujcPh_E-PRP9kxI_-YD2CbAgLnXIM
- Precious Plastic (2018). Found at https://preciousplastic.com/